Hey everyone, it’s Jake from your go-to Hipot tester supplier, and I know from dealing with hundreds of manufacturers over the years that a lot of you sleep on simple maintenance for your hipot testers. Like, I’ve been on calls with guys whose high-pot units crapped out mid-production run because they skipped small, easy checks, and that’s a headache no one needs. Today, I’m breaking down exactly what you need to do to keep your hipot tester running smooth, no fancy tools or engineering degrees required. Let’s dive in. Hipot Tester
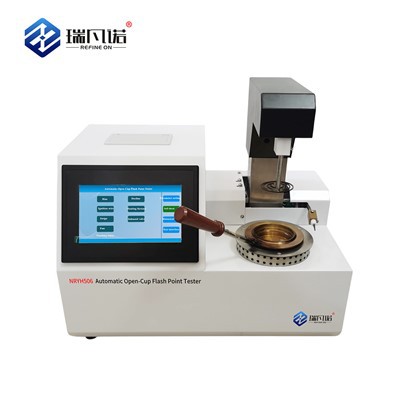
First off, let’s get one thing straight: hipot testers are workhorses. They’re the ones that make sure your electronics don’t shock someone, don’t short out on the assembly line, or catch fire down the line. Skimping on maintenance isn’t just “bad for the machine”—it’s bad for your product, your team, and your customers. I’ve seen a startup get hit with a recall because their hipot tester wasn’t checking insulation right, all because they waited till the unit was broken to fix it. Don’t be that guy.
Let’s start with the weekly stuff, the quick checks that take 10 minutes max, no interrupting production. First, visual deep dive. Grab a flashlight and walk around the tester—look for frayed wires, loose connectors on the test leads, cracks in the insulation of the test terminals. I can’t tell you how many times I’ve heard “the lead stopped giving a reading” only to find a tiny fray at the end of the clip. Those leads take a beating every day—clipping onto metal components, getting stepped on, dragged across floors. Even a ¼-inch fray can mess up the test signal. Also, check the power cord. If it’s scuffed where it plugs into the wall or the tester, that’s a safety hazard for you too. We once had a customer get a tiny shock when reaching for their tester, all because they missed a power cord fray on their last weekly check. Not worth it.
Next, the sanity check test. I always tell customers to grab a simple continuity resistor (or even a known good power cord—something you know has solid insulation) and run a test once a week. Set the hipot to a low voltage, like 500V, and apply it to the resistor. If the tester doesn’t pick up the insulation pass, you know there’s a glitch—either in the leads, the terminals, or the unit itself. This isn’t overkill; it’s a way to catch issues before they make you waste a batch of parts. Another weekly thing: clean the test terminals. Build-up of dust, flux, or metal shavings from PCB assembly gets in there, and that messes with conductivity. Use a cotton swab dipped in isopropyl alcohol (90%+), no paper towels—they leave lint. Swab each terminal till it’s shiny, wipe off excess alcohol, and let it dry for a minute. Done.
Now, the monthly deep dive, the stuff that takes 30 minutes and pays off big time. First, calibration. I know calibration sounds scary, but it’s not just for big labs. Your hipot’s voltage and leakage current readings have to be accurate, right? If it says 1500V and it’s actually 1300V, you might pass a part that should fail, or fail a good one. We sell calibration decals for every tester we supply, super cheap, and I tell customers to calibrate every 30 days if they’re running the unit 24/7, every 60 days if it’s only used during regular shifts. Pro tip: write the calibration date on the unit’s front panel in permanent marker, so no one forgets. Also, don’t rely just on the built-in calibration function—use an external calibrated multimeter or a hipot calibration box, those are way more accurate. Most customers don’t have one, so we offer calibration services for our units, quick turnaround too.
Second monthly task: air filter check. Hipot testers run hot, they pull air in to cool down the circuit boards. If the air filter is clogged with dust, the unit overheats, and that’s when parts start failing. Where’s the filter? Usually on the back or side, a small plastic mesh cover. Pull it off, either vacuum it (low suction, so you don’t tear it) or rinse it with warm soapy water, let it air dry completely before putting it back. I had a customer once who forgot their filter for 3 months, and the main circuit board burned out—cost them $800 in parts plus downtime. The filter is a $5 part, people. Worth it. Also, while you’re inside the unit (only do this if it’s unplugged, by the way), blow out any excess dust from the internal fans with a can of compressed air. Hold the can upright, so no liquid comes out, and keep moving so you don’t damage the fan blades.
Third monthly thing: test lead inspection, deeper version. Look for kinks in the lead cable, not just frays. Kinks can break the internal wires over time, leading to intermittent connections. Test each lead for continuity with a multimeter—clip the multimeter to the metal end of the clip and the other end of the lead, wiggle the cable while you do it. If the reading flickers, that means a broken wire inside. Either replace the lead, or if it’s minor, you can cut off the damaged end and re-crimp the clip. We sell replacement clips and leads super cheap, so no need to hack it if it’s too far gone.
Now, the annual big stuff, the once-a-year maintenance that’s like a tune-up for your car. First, full professional calibration. Even if you do monthly checks, a full calibration by a certified tech is the only way to make sure the voltage and current are spot-on. We offer on-site calibration for customers in North America, or you can ship the unit back to our warehouse, we turn it around in 2 business days, with a certificate you can use for OSHA or ISO audits. Speaking of audits—if you’re in a regulated industry (automotive, medical, aerospace), this annual calibration is non-negotiable. No certificate, no compliance, that’s a big problem.
Second annual task: internal component check. Unplug the tester, take off the side panel, and look for any bulging capacitors. Bulging capacitors are the number one cause of hipot tester failure, they swell up when they go bad, and if they leak, they can ruin the whole circuit board. If you see a bulging capacitor, don’t try to replace it yourself unless you know what you’re doing—send it to us, or hire a local tech, it’s way cheaper than a new unit. Also, check all the internal connectors, make sure none are loose, give them a gentle push to seat them properly. And if your unit has a cooling fan, test it—run the tester for 10 minutes, feel the air coming out of the back. If it’s not blowing hard, replace the fan, it’s a $20 part.
Third annual thing: documentation and backup. Write down all your maintenance dates, calibration dates, any issues you had that year. That way, if something breaks, you can look back and see if it’s a recurring issue. Also, back up the test settings on your hipot—most modern units have a way to save presets. Use a USB drive, email them to yourself, whatever. If the unit crashes, you don’t want to re-program all 20 test settings from scratch.
Wait, let’s talk about common mistakes I see all the time. First, skipping weekly checks because “the unit works fine”. Until it doesn’t. I have a customer who runs their hipot 12 hours a day, 5 days a week, and they do the weekly checks no matter what. Last month, they noticed the leakage current was off by 0.2mA, found a tiny lead fray before it got worse. If they skipped that weekly check, they would’ve wasted a week’s worth of parts when the lead totally failed mid-run. Second, using the wrong cleaning supplies. No window cleaner, no degreaser on the terminals—alcohol only, that’s it. Window cleaner leaves residue that messes with conductivity. Third, ignoring error codes. If your hipot throws an error, don’t just hit “reset” and keep going. Jot down the error code, look it up in the manual, or give us a call. Most errors are easy fixes, not a unit replacement.
Oh, and one more thing: storage when not in use. If your hipot is sitting idle over a weekend, holiday, or a plant shutdown, unplug it, wrap the leads loosely (don’t coil them tight, that causes kinks), and store it in a dry, cool place. No basement, no attic, places with humidity or extreme temps are bad for internal parts.
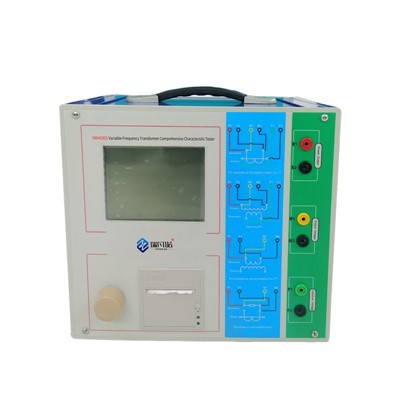
At the end of the day, maintaining your hipot tester doesn’t have to be a huge chore. It’s just a few small, regular tasks that add up to less downtime, fewer bad parts, and a safer work environment. We’re here to help every step of the way—whether you need replacement parts, calibration, or troubleshooting, our team is on standby. If you’re looking to upgrade your current hipot tester, or just need a hand with maintenance tips specific to your unit, hit us up to connect for procurement and discussions. We’ll walk you through everything, no pressure, no confusing jargon.
Transformer Oil Tester References:
- National Institute for Occupational Safety and Health (NIOSH). Electrical Safety: High Potential (Hipot) Testing.
- Institute of Electrical and Electronics Engineers (IEEE). Standard for Safety Levels With Respect to Human Exposure to Electric, Magnetic, and Electromagnetic Fields, 0 Hz to 300 GHz.
- Underwriters Laboratories (UL). Standard for Safety for Electrical Equipment, UL 61010-1.
- Fluke Corporation. Maintenance Best Practices for Electrical Test and Measurement Equipment.
Refine On (Hebei) Electric Power Technology Co., Ltd.
Refine On (Hebei) Electric Power Technology Co., Ltd. is one of the most reliable hipot tester manufacturers and suppliers in China, also supports customized service. Please feel free to wholesale advanced hipot tester at competitive price from our factory. Contact us for quotation.
Address: Building 13, Liandong U Valley, No.64, Jing SAN South Street, Economic Development Zone, Mancheng District, Baoding City, China
E-mail: victor@transformer-test.com
WebSite: https://www.transformer-test.com/
